The Focusrite Scarlett 2i2 4th Gen is the best beginner audio interface for most Ableton Live setups. It gives you two microphone, line or instrument paths, enough gain for a wide range of microphones, and Auto Gain plus Clip Safe to reduce avoidable setup mistakes. If you need clearer hardware meters and 5-pin MIDI, choose the MOTU M2. The Audient iD4 MKII is the compact choice for one microphone and one instrument, while the UA Volt 2 and SSL 2 MKII suit people who prefer simple physical controls.
| Best for | Interface | Important limit |
|---|---|---|
| Most beginners | Focusrite Scarlett 2i2 4th Gen | No 5-pin MIDI |
| Visible metering and hardware MIDI | MOTU M2 | No automatic gain safety feature |
| One microphone plus one instrument | Audient iD4 MKII | Only one microphone preamp |
| Simple controls plus MIDI | Universal Audio Volt 2 | Basic input metering |
| Manual two-input workflow | SSL 2 MKII | No 5-pin MIDI |
Start with the sources you need to record at the same time. That decision matters more than a maximum sample-rate number or a large plug-in bundle. Every model here can cover ordinary home production in Live; the wrong input layout cannot be fixed by converter specifications.
Choose the input layout before the brand
A solo vocalist can work with one microphone preamp. A singer recording vocal and guitar on separate microphones needs two preamps. A stereo synthesizer normally needs two line inputs at once. If you want to record the synth in stereo while keeping a microphone connected and ready, a two-input interface is already full.
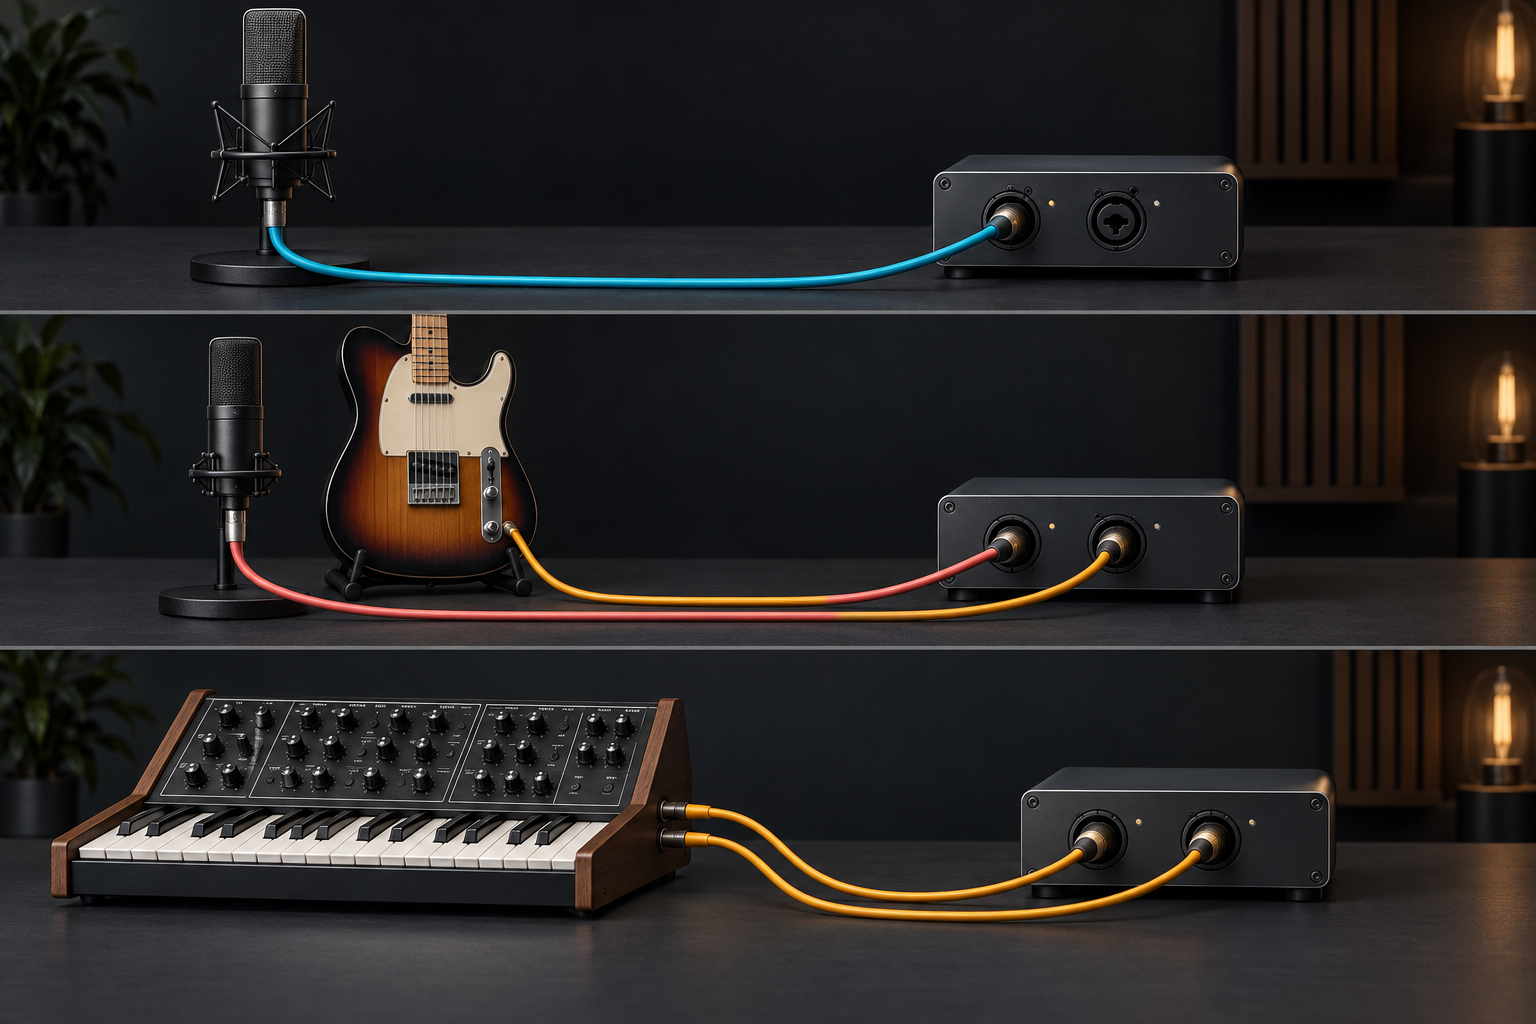
MIDI ports solve a separate problem. A keyboard that already sends MIDI over USB does not require 5-pin MIDI on the audio interface. A hardware synth with DIN MIDI may benefit from it, especially when you want one USB connection for audio and one stable hardware MIDI path. MIDI carries performance data, not the synth's sound; the synth still needs audio cables into the line inputs.
The five best beginner interfaces for Ableton Live
1. Focusrite Scarlett 2i2 4th Gen — best overall
The Scarlett 2i2 is my default recommendation because its two inputs leave room for the common next step: recording two sources together. Focusrite's current specification lists two microphone preamps, two line/instrument inputs, loopback and a 69 dB microphone gain range. Auto Gain can set a starting level from a performance, while Clip Safe can reduce gain when the input approaches clipping.
Those safeguards do not replace listening or sensible microphone placement, but they make the first recording session less fragile. Sound On Sound also identifies the wide gain range, front-panel feedback, Auto Gain and Clip Safe as practical strengths. The trade-off is the digitally shared input control: you select an input before changing its gain, rather than having one permanent gain knob per channel. There is no 5-pin MIDI.
2. MOTU M2 — best meters and MIDI
The MOTU M2 is the better fit when you want to see input and output levels clearly without opening another window. The M Series guide shows two mic/line/Hi-Z inputs, per-channel phantom power, color meters, hardware direct monitoring and 5-pin MIDI input and output. That combination suits a small synth setup as well as microphones and guitars.
The meters are more informative than a simple signal-and-clip light, but they do not make gain staging automatic. You still set the input level from the loudest expected performance. Independent buyer guides also highlight the M2's full-color metering, direct monitoring and MIDI connectivity. I would choose it over the Scarlett when visible levels and DIN MIDI matter more than Auto Gain.
3. Audient iD4 MKII — best compact one-mic setup
The iD4 MKII is the most focused option here. Audient's technical specification lists one mic/line preamp and one separate instrument input. That means it can handle a microphone and a directly connected guitar or bass, but it cannot record two microphones at the same time.
This limitation is also the reason the layout stays simple. The large top control, hardware monitor mix and two headphone sockets suit a compact desk where one performer records one microphone. Sound On Sound describes the practical arrangement as one rear mic/line input plus a front instrument input. Both headphone sockets carry the same mix, so this is not a two-performer cue system.
4. Universal Audio Volt 2 — best simple option with MIDI
The Volt 2 gives you two mic/line/instrument inputs and 5-pin MIDI without turning the front panel into a menu system. Universal Audio's current specifications confirm two full input paths, stereo monitor outputs, one headphone output and MIDI input/output. The optional Vintage mode changes the input character; it is a creative choice rather than a requirement for a clean recording.
The main weakness is feedback. Sound On Sound found the Volt 2 simple to use, but noted its limited two-segment input indication and fixed-level direct-monitor path. If you want detailed hardware meters, buy the M2. If you want two straightforward inputs and MIDI with minimal setup, the Volt 2 remains easy to understand.
5. SSL 2 MKII — best for manual hardware control
The SSL 2 MKII is for the beginner who wants each input to have an obvious physical control. Solid State Logic lists two mic/line/instrument inputs, 64 dB of preamp gain, balanced monitor outputs and stereo loopback. The front panel is spacious, and the gain, input mode, phantom power and monitor controls do not depend on a companion app for ordinary recording.
It has no 5-pin MIDI, and it takes more desk space than the iD4. Be careful when reading reviews: the SSL 2+ MKII adds connections and headphone features that do not belong to the SSL 2 MKII. I would pick the smaller model for its two-input manual workflow, not for features listed on its larger sibling.
Hardware direct monitoring and monitoring through Live are different
Hardware direct monitoring sends the interface input straight to its headphone output. The performer hears the dry input without waiting for the computer to process a Live track. This is useful for vocals, guitar and other timing-sensitive recording, but the direct signal may not include Live's plug-ins.
Monitoring through Live sends the input into the computer, through the track and plug-ins, then back to the interface. This lets a singer hear reverb or a guitarist hear an amp device, but the route includes driver, buffer, device and plug-in delay. Lowering the buffer can reduce that delay while increasing CPU pressure. It cannot guarantee zero latency.
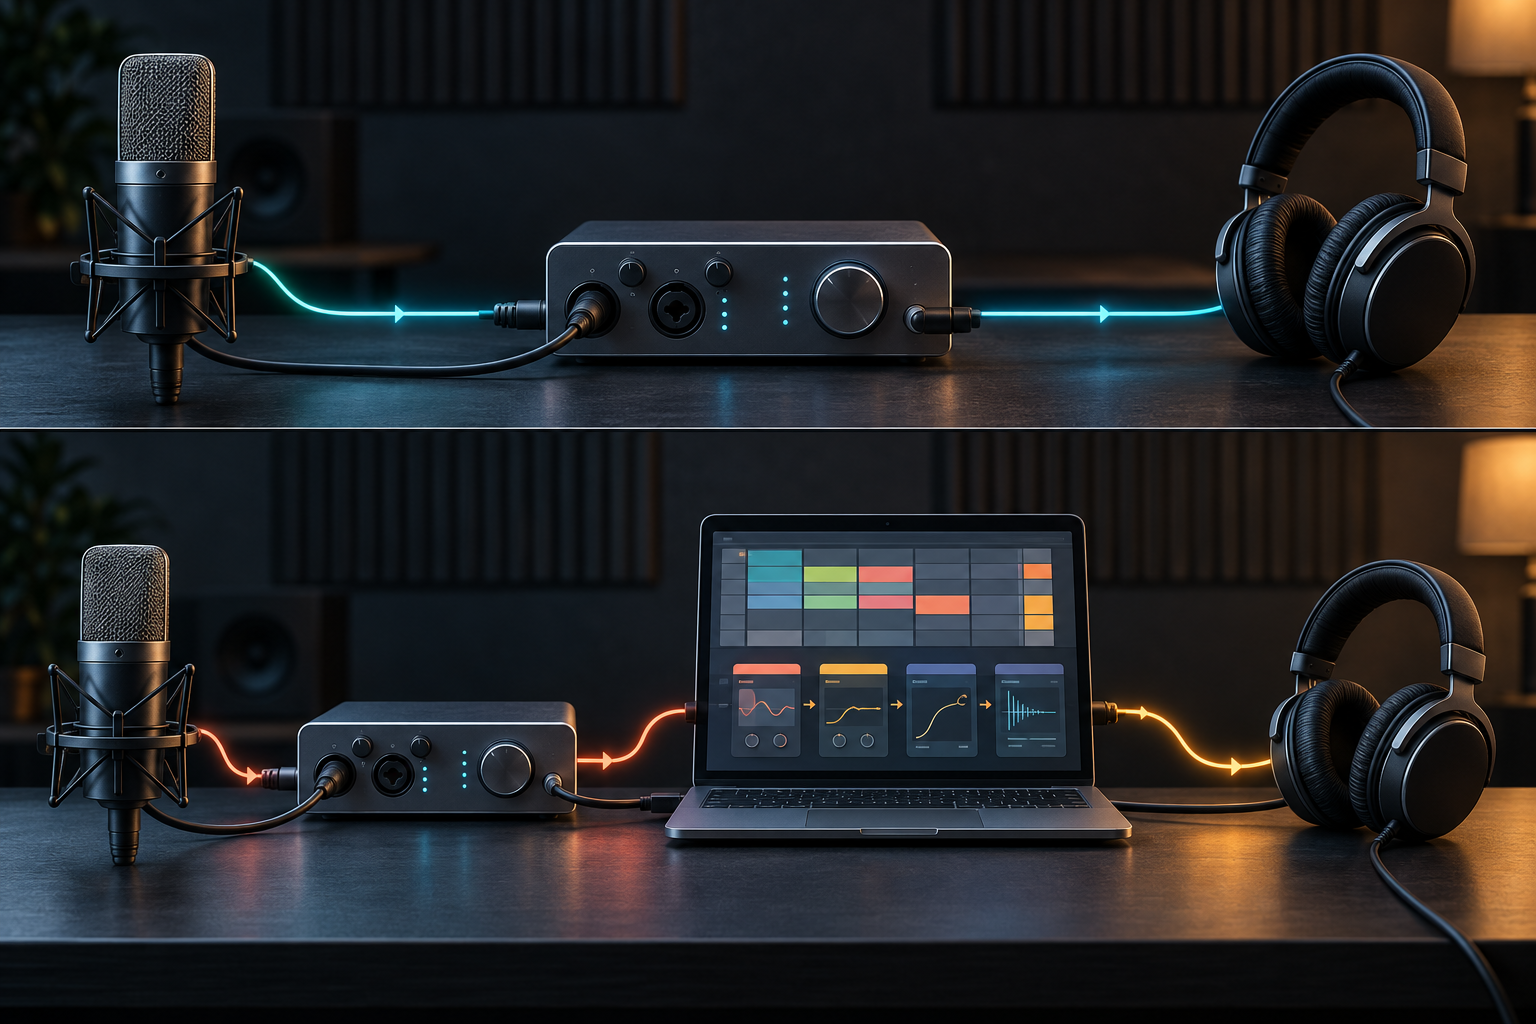
If timing feels late, first identify which path you are hearing. Do not enable both paths at equal level unless you deliberately want the doubled sound; the small timing difference can create a hollow or phase-like effect. Our Ableton recording latency guide covers buffer size, plug-in delay and track monitoring in more detail.
Set up the interface in Ableton Live
- Install the manufacturer's current driver or control software when the model requires it. On macOS, a class-compliant interface may appear without a separate driver.
- Connect the interface directly while troubleshooting. Avoid adding a hub until the basic path works.
- Open Live's audio settings. Select Core Audio on macOS or the interface's ASIO driver on Windows.
- Select the interface as the input and output device.
- Enable only the mono and stereo channels you need in the input and output configuration.
- Create an audio track, choose the correct input under Audio From, then set Monitor to Off, Auto or In for the intended recording path.
- Set gain from the loudest part of the performance and leave headroom. Do not normalize a clipped recording later and expect it to recover.
This order follows Ableton's current interface setup guidance, which recommends Core Audio on macOS, ASIO on Windows, direct connection where practical and enabling only the channels you need. The site's Live 12 setup checklist covers the rest of the initial audio, library and plug-in configuration.
What beginners can ignore
- Maximum sample rate as a ranking: every model here covers normal recording and production. A higher printed ceiling does not prove better sound or lower practical latency.
- Dynamic-range league tables from unrelated tests: manufacturers and reviewers may use different signal levels, weightings and methods. Compare measurements only when the method is compatible.
- Large software bundles: useful plug-ins are welcome, but they should not decide whether the interface has enough inputs or the right monitoring path.
- “Zero latency” promises: direct monitoring shortens the listening route, but the complete setup still has analog, converter and software behavior to manage.
Do you need an audio interface for Ableton Live?
You do not need an interface to arrange MIDI, edit clips or listen through a laptop's built-in output. You need one when you want proper microphone and instrument inputs, balanced monitor connections, a dedicated headphone output or a more controllable recording and monitoring path.
For most beginners, buy a two-input model once the recording plan is clear. Choose the Scarlett 2i2 for the broadest starting point, the M2 for meters and MIDI, the iD4 for one microphone plus instrument, the Volt 2 for simple MIDI-equipped hardware, or the SSL 2 MKII for direct physical control. Before ordering, write down every source you need to record simultaneously and every connector it uses. That one list prevents more mistakes than another hour comparing sample-rate numbers.