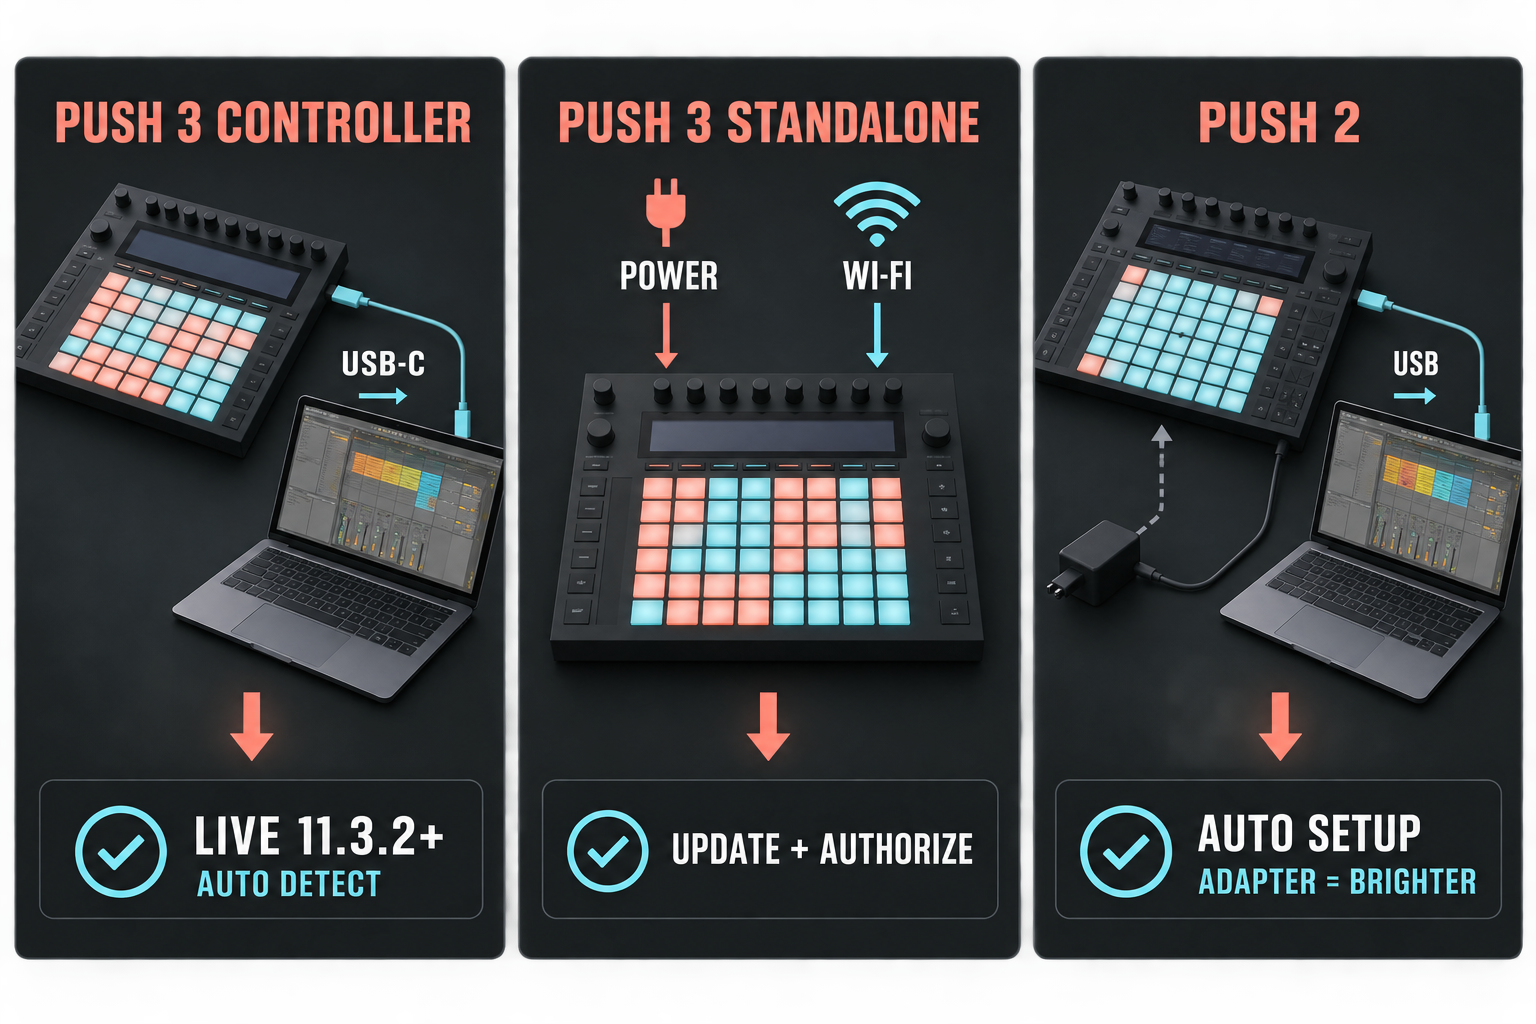
Short answer: use the setup path that matches the hardware. Push 3 in controller mode connects by USB-C to a computer running Live 11.3.2 or later and is detected automatically. Push 3 standalone needs power, Wi-Fi and its first-run update before it can work away from the computer. Push 2 is a controller: USB is enough to run it, while the power adapter mainly gives you a brighter display and pads.
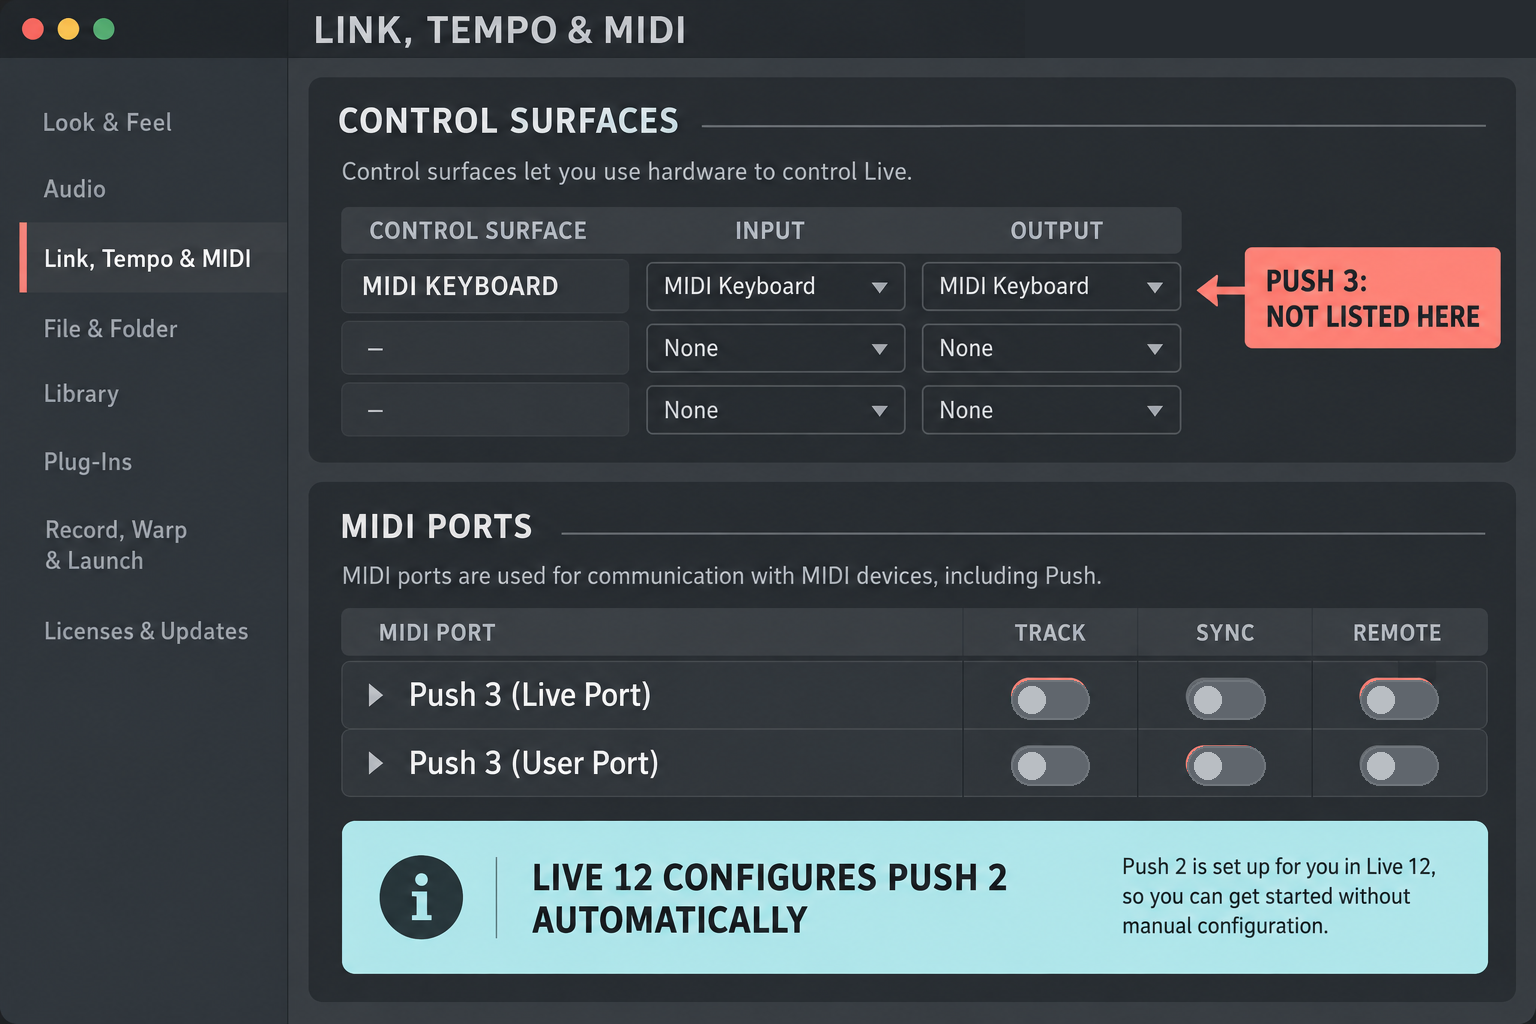
The setting that prevents most bad advice: Push 3 does not appear in Live’s Control Surface list. Do not try to add it there. In Live 12, Push 2 is also configured automatically, and adding a second manual Push 2 entry can create problems.
Choose your Push setup path
| Hardware and mode | First connection | Correct Live behavior | Common mistake |
|---|---|---|---|
| Push 3 controller | USB-C to the computer; Live 11.3.2+ | Automatic detection; Live Port and User Port appear under MIDI Ports | Looking for Push 3 in the Control Surface list |
| Push 3 standalone | External power, then Wi-Fi for onboarding, update and optional license authorization | Runs Sets on Push after compatible Projects, Packs and devices are prepared | Transferring a loose ALS file or a Set that depends on desktop plug-ins |
| Push 2 | USB to the computer; power adapter optional | Automatic configuration in Live 12 | Assuming the adapter is required or adding a duplicate Control Surface row |
Set up Push 3 as a Live controller
A controller-mode Push 3 does not need a manual control-surface assignment. Ableton’s current Push 3 controller setup requires Live 11.3.2 or later and says Live detects the unit automatically.
- Check the Live version. Update Live before diagnosing ports if the computer is running anything older than 11.3.2.
- Connect Push directly by USB-C. Use a cable that carries data. For the first connection, skip an unpowered hub or dock so there is one less failure point.
- Choose controller mode on standalone hardware. On Push, open Setup → Status and switch to controller mode if it is currently running standalone.
- Open Live and wait for automatic detection. Do not add Push 3 in Settings → Link, Tempo & MIDI → Control Surface; it is not supposed to appear there.
- Check MIDI Ports instead. A detected unit exposes Push 3 (Live Port) and Push 3 (User Port). The Live Port carries Push’s native control integration. The User Port is the route to use when a custom MIDI mapping or user-mode workflow specifically needs it.
- Confirm the musical path. Load a blank Set, place an instrument on a MIDI track and select the track. If Push controls Live but the instrument stays silent, the remaining problem is likely track routing or monitoring rather than Push detection.
The controller can work over USB without the external Push power supply. A weak USB path or unsuitable cable can still cause detection or power problems, so “the unit lights up” does not prove the connection carries data.
Complete Push 3 standalone first-run setup
Standalone setup prepares Push itself, rather than merely pairing a controller with Live. Connect the supplied power adapter, turn Push on and follow the onboarding prompts. Join Wi-Fi so Push can update its software and reach Ableton’s authorization service.
Live 12 Intro included on Push can be used without another authorization step. If your Ableton account owns Live 11 or later, you can authorize that license on Push through push.local. Ableton says this does not consume another Live unlock. The exact account screens are service-dependent, so use the current standalone setup page when the wording on Push differs.
Prepare a desktop Project before transfer
A Set opening on the computer does not guarantee that the same Project will open unchanged on standalone Push. Prepare the Project while you still have the desktop version in front of you:
- Put the Set inside a Project folder. Transfer the whole Project, not an isolated ALS file.
- Run Collect All and Save. This gathers referenced audio into the Project and reduces missing-file failures.
- Resolve third-party plug-ins. Standalone Push does not load VST or Audio Unit plug-ins. Freeze or render tracks that depend on them before transfer.
- Review Max for Live devices. Support is limited; Jitter, external objects and some device features are unavailable. Freeze or flatten anything critical when compatibility is uncertain.
- Install the same Packs on Push. A Set can still be incomplete when its Pack content is absent from the hardware.
- Connect Push and the computer to the same network. Then transfer the Project using Ableton’s documented Push workflow.
- Open the transferred Set on Push before a session or performance. Missing media and unsupported devices should be found while the computer copy is still available.
Ableton’s standalone workflow guide is the authority for current transfer and compatibility details. Treat Freeze/Flatten as a compatibility decision, not a substitute for keeping an editable desktop Project.
Set up Push 2 in Live 12
Push 2 only works as a Live controller. Connect its USB cable to the computer and open Live. In Live 12, the controller is configured automatically. Do not add a second Push 2 entry in the Control Surface area merely because an older tutorial tells you to do so.
The external power adapter is optional for operation. USB can power Push 2; the adapter raises the brightness of the display and pads. That makes it useful in a bright room or on stage, but its absence is not proof of a failed setup.
Older Live releases used a visible Control Surface row for Push 2, which explains why legacy guides show manual Input and Output selections. Apply those instructions only when you have confirmed the older Live version they were written for. The current Push 2 Help section should take priority over a retired setup URL or an undated screenshot.
If Push 3 is not detected
- Confirm Live is version 11.3.2 or later.
- On standalone hardware, open Setup → Status and confirm controller mode.
- Replace the USB-C cable with a known data cable and test a direct computer port.
- Quit Live, power-cycle Push, reconnect it and reopen Live.
- Look for Push 3 (Live Port) and Push 3 (User Port) under MIDI Ports. Do not create a Push 3 Control Surface row as a workaround.
- Update Live and Push software before repeating the connection check.
If the ports still do not appear or the connection drops repeatedly, use the focused Push 3 not connecting guide. It keeps recovery steps separate from normal setup and helps decide when the cable, USB path, software or hardware needs attention.
If Push 2 is not detected
- Try a direct USB port and a different data cable.
- Disconnect nonessential USB devices temporarily.
- Restart Push 2 and Live after reconnecting the cable.
- In Live 12, remove a duplicate manual Push 2 Control Surface entry if one was added while troubleshooting, then let automatic setup run again.
- On Windows, allow Live’s Push display driver installation to complete and restart when the current Ableton instructions require it.
- Test the power adapter when the controller is dim or the USB port seems underpowered, while remembering that the adapter is not normally required for operation.
Configure audio and external MIDI after Push works
Push control, audio output and external MIDI are separate layers. First prove that Push controls Live. Then choose the audio interface in Live’s Audio settings and confirm speakers or headphones receive the master output. Only after that should you add external synths, clock or custom mappings.
For MIDI ports, enable Track when the port must play instruments, Remote when it must map controls and Sync when it must exchange MIDI clock. Turning on every switch for every port makes feedback and duplicate messages harder to diagnose. The live-performance MIDI mapping guide covers that next layer; the MIDI input troubleshooting guide covers track arming and monitoring.
First-session checklist
- The hardware is in the intended mode: Push 3 controller, Push 3 standalone or Push 2 controller.
- Push 3 controller is attached to Live 11.3.2 or later and was detected without a Control Surface entry.
- Push 3 Live Port and User Port appear under MIDI Ports when Push 3 is connected.
- Push 2 is automatically configured in Live 12 without a duplicate manual row.
- A selected MIDI track with an instrument responds to the pads.
- The chosen audio interface sends sound to the correct speakers or headphones.
- A standalone Project was collected, checked for plug-in and Max for Live limits, transferred in full and opened on Push.
Once those checks pass, continue with the broader Ableton Live 12 setup guide to organize the audio interface, buffer, folders and default Set around the way you plan to use Push.
Frequently asked questions
How do I set up Ableton Push?
For Push 3 controller mode, install Live 11.3.2 or later, connect USB-C and let Live detect it automatically. For Push 3 standalone, connect power, join Wi-Fi and complete onboarding and updates. For Push 2 in Live 12, connect USB and let Live configure it automatically.
Can I use Ableton Push without a computer?
Only the standalone version of Push 3 can run Sets without a computer. Push 3 controller and Push 2 require a computer running Ableton Live.
Is Ableton Push good for beginners?
It can be, especially when the goal is to learn Live through pads, clips and devices rather than constant mouse work. The hardware does not remove the need to understand tracks, monitoring and project files, so beginners should get one blank Set working before loading a complex template.
Is Ableton Push good for live performance?
Push is designed around Live’s clip, device and performance workflows, but reliability comes from preparation: use a direct connection, remove unsupported standalone dependencies, verify the audio path and open every performance Set on the exact hardware before the show.